
Think of your menu as the friendly tour guide of your website, pointing out the must-see attractions and hidden gems tucked away in the corners of your pages.
Whether you’re a blogging newbie or a seasoned webmaster, mastering the art of menu navigation in WordPress can transform your site from a maze of content into a well-organized, user-friendly experience.
Buckle up as we share how to create, customize, and perfect your WordPress navigation menus. Get ready to make your website a destination worthy of exploring!

Understanding WordPress Menus
Menus are more than just a list of links. They are the pillars of your website’s navigation architecture.
Understanding how these menus work, from their structural composition to their interactive elements, is key to mastering the overall UX of your website.
Each menu you create is a chapter, leading your audience through the narrative of your website, ensuring a user-friendly and engaging experience.
Basics of Menu Functionality
Menus in WordPress are versatile tools that allow you to link to various content types, like pages, posts, categories, and custom links.
You can create multiple menus for different purposes, such as main navigation, footers, or social links.
Each menu item can be easily added, edited, or rearranged through the WordPress dashboard, offering flexibility in how you present your site’s structure.
Menu Locations and Themes
Menu locations vary depending on the theme you use. Most themes offer primary menu locations, typically at the top of your site, and secondary locations like footers or sidebars.
These locations are predefined by your theme and are designed to integrate seamlessly with its overall design. Choosing the right theme can significantly impact how your menus are displayed and interacted with, ensuring they complement your site’s aesthetic and enhance user experience.
By understanding these elements, you can effectively organize and present your site’s content, making navigation a breeze for your visitors.
Creating Your First WordPress Menu
Setting up your first WordPress menu can significantly enhance your website’s user experience. A well-organized menu guides your visitors through your site’s content effortlessly and reflects your website’s professional structure.
Think about the most important pages or sections that your audience should visit. These could be your home page, about page, services, blog, or contact section. Prioritize these in an order that makes sense and is easy to navigate.
Step-by-Step Menu Setup

Creating a menu in WordPress might seem daunting at first, but by following a few simple steps, you can set up a functional and aesthetically pleasing navigation menu.
- Access Menu Editor: In your WordPress dashboard, navigate to ‘Appearance’ and select ‘Menus’.
- Selecting a Menu Location: Once you’ve named your menu, the next step is to choose where it will be displayed on your website. Most themes offer several locations, such as the header, footer, or sidebar.
- Adding Menu Items: To add items to your menu, simply select pages, categories, or custom links from the left-hand panel and click on ‘Add to Menu.’ You can add various content types to your menu, including posts, categories, and custom links.
- Organizing Menu Items: Drag and drop the items to arrange them. Sub-items can be created by dragging an item slightly to the right of another item, creating a drop-down effect in your menu.
- Customizing Menu Items: Click on any menu item to edit its navigation label or remove it from the menu. You can also add custom CSS classes for advanced styling (optional).
- Saving Your Menu: Don’t forget to click ‘Save Menu’ once you’re satisfied with your menu’s structure.
Adding Pages and Categories to Menus
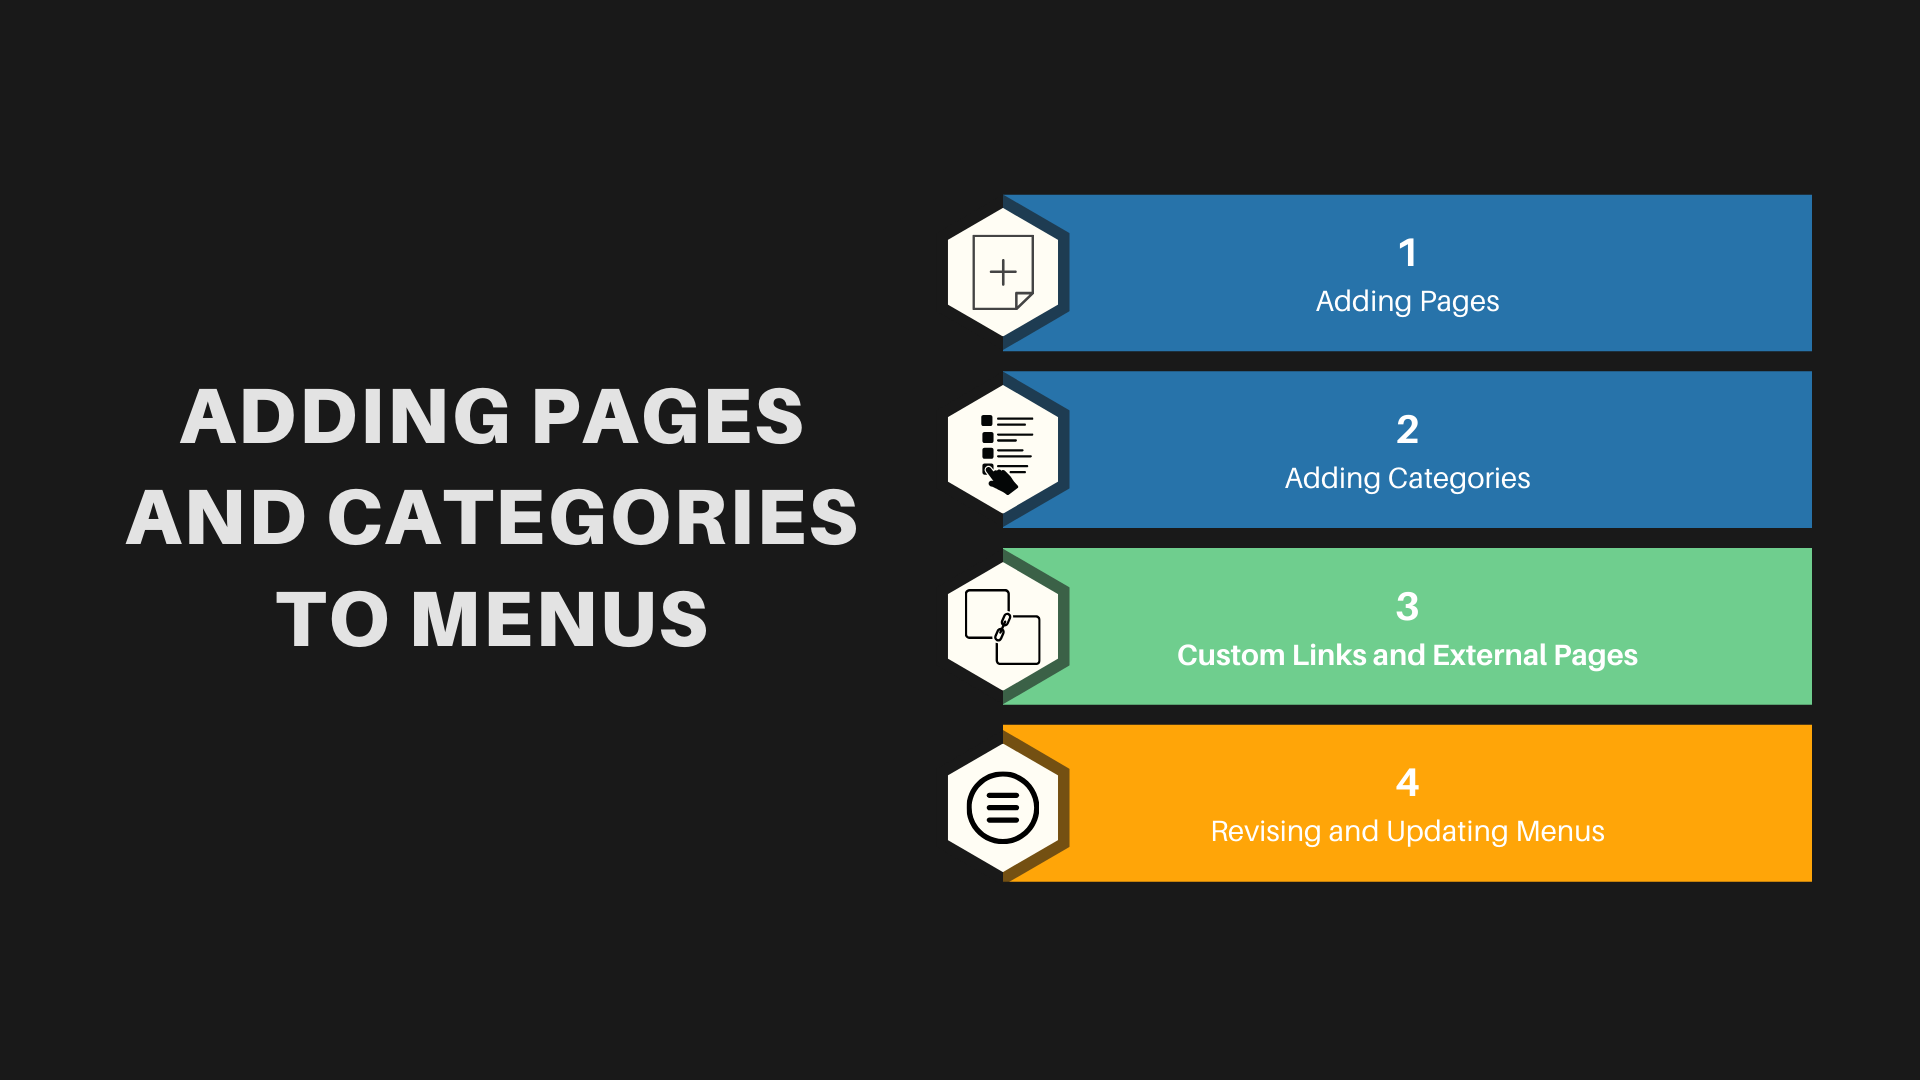
Adding pages and categories to your WordPress menu enhances its functionality, making it easier for visitors to find what they’re looking for on your site.
- Adding Pages: To add a page to your menu, go to the ‘Pages’ panel on the left-hand side, select the pages you want to add, and then click ‘Add to Menu’. You can add any pages you’ve created, from your home page to custom landing pages.
- Adding Categories: Similarly, to add categories, switch to the ‘Categories’ panel. This is particularly useful for blogs or websites with a lot of content, as it helps visitors to navigate through different topics or services.
- Custom Links and External Pages: Don’t limit your menu to just your own pages and categories. You can add custom links to direct visitors to external sites or resources, or to sections within a page on your website.
- Revising and Updating Menus: Your menu isn’t set in stone. As your website grows, regularly revisit your menu structure to ensure it continues to serve the needs of your visitors effectively.
Advanced Menu Customization
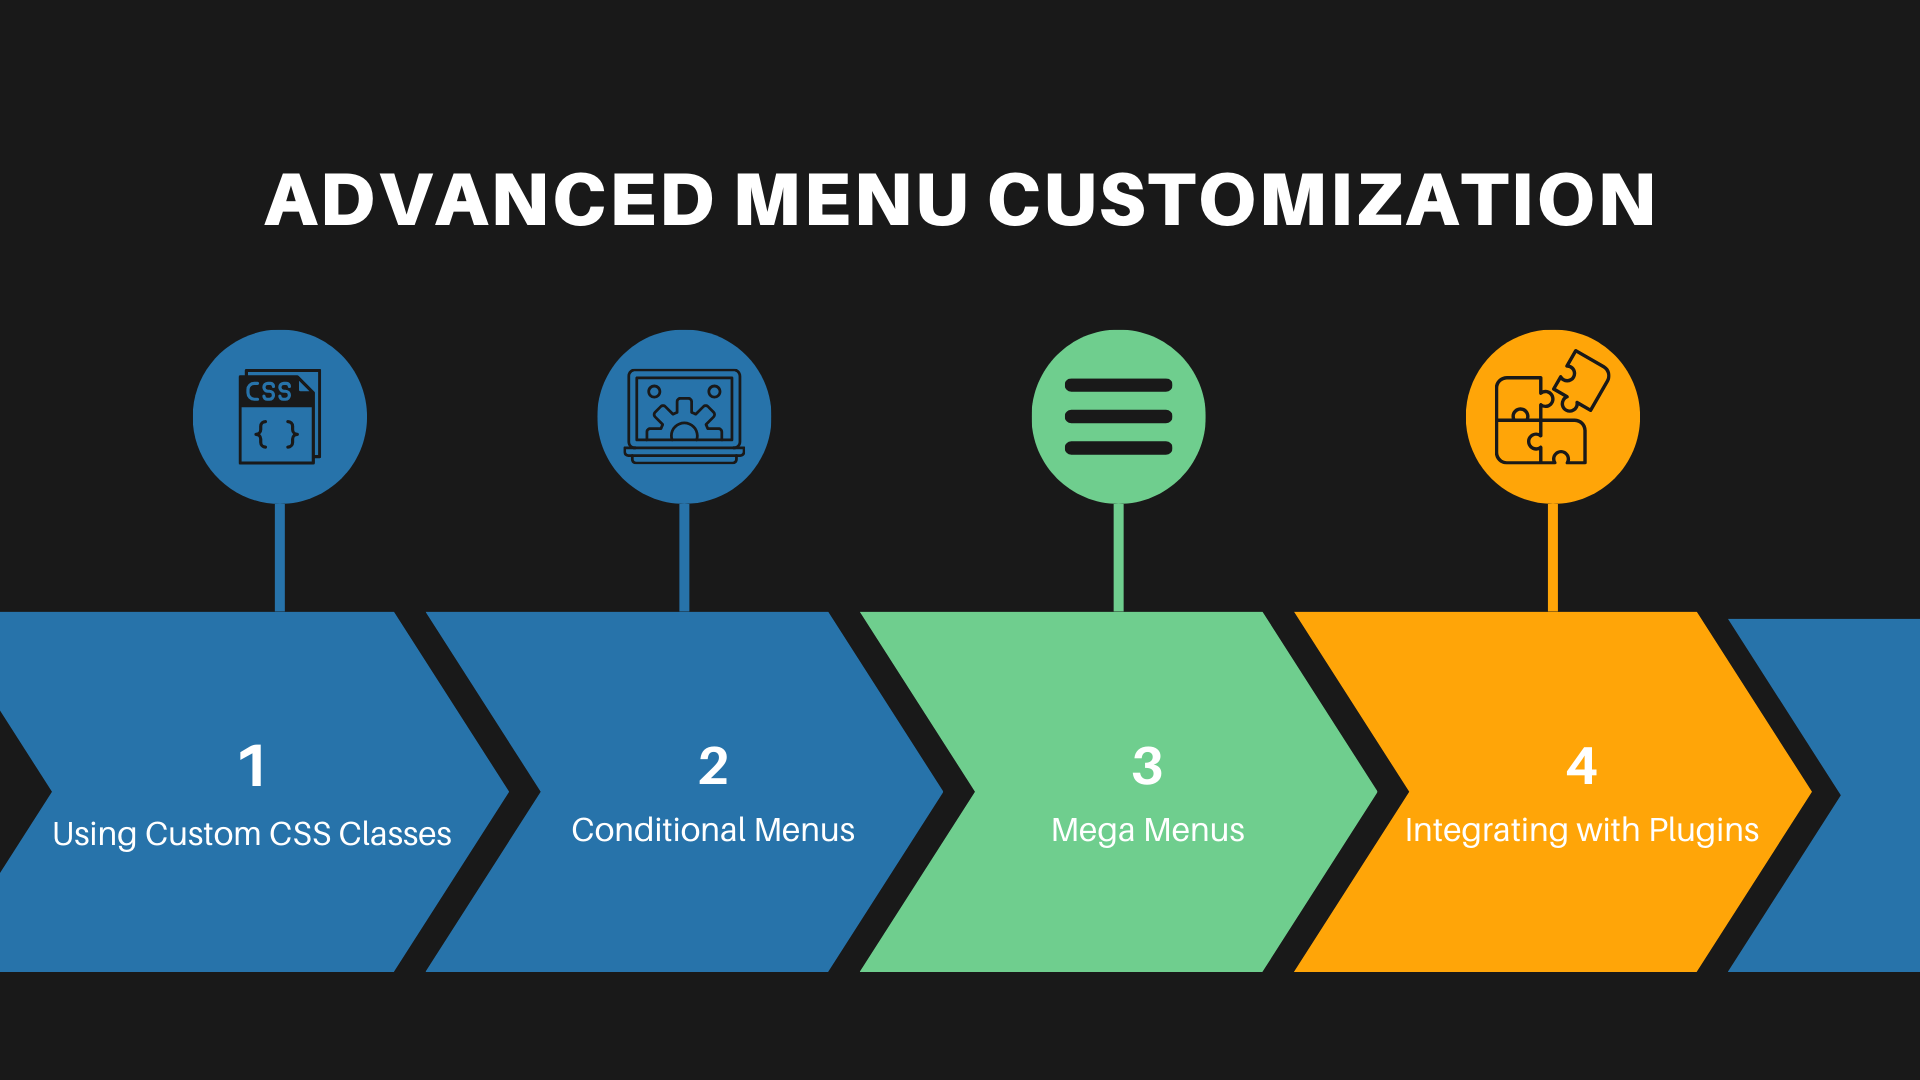
Once you’re comfortable with the basics of WordPress menu management, you can dive into advanced customization. This allows you to tailor the navigation experience to fit your website’s unique style and your audience’s needs.
- Using Custom CSS Classes: Within the menu item settings, you have the option to add custom CSS classes. This feature is invaluable for those who want to apply specific styles to certain menu items, like changing colors or font sizes.
- Conditional Menus: Some themes and plugins offer the functionality to display different menus based on certain conditions, like a user’s logged-in status or the page they’re viewing.
- Mega Menus: Mega menus can be a game-changer for sites with extensive content. These larger menus can feature multiple columns of links, images, and even widgets. They’re ideal for e-commerce sites or large blogs.
- Integrating with Plugins: There are numerous plugins available that can enhance your menu’s capabilities. The possibilities are endless, from adding image icons to menu items to creating fully responsive sliding menus.
Incorporating Drop-Down Menus
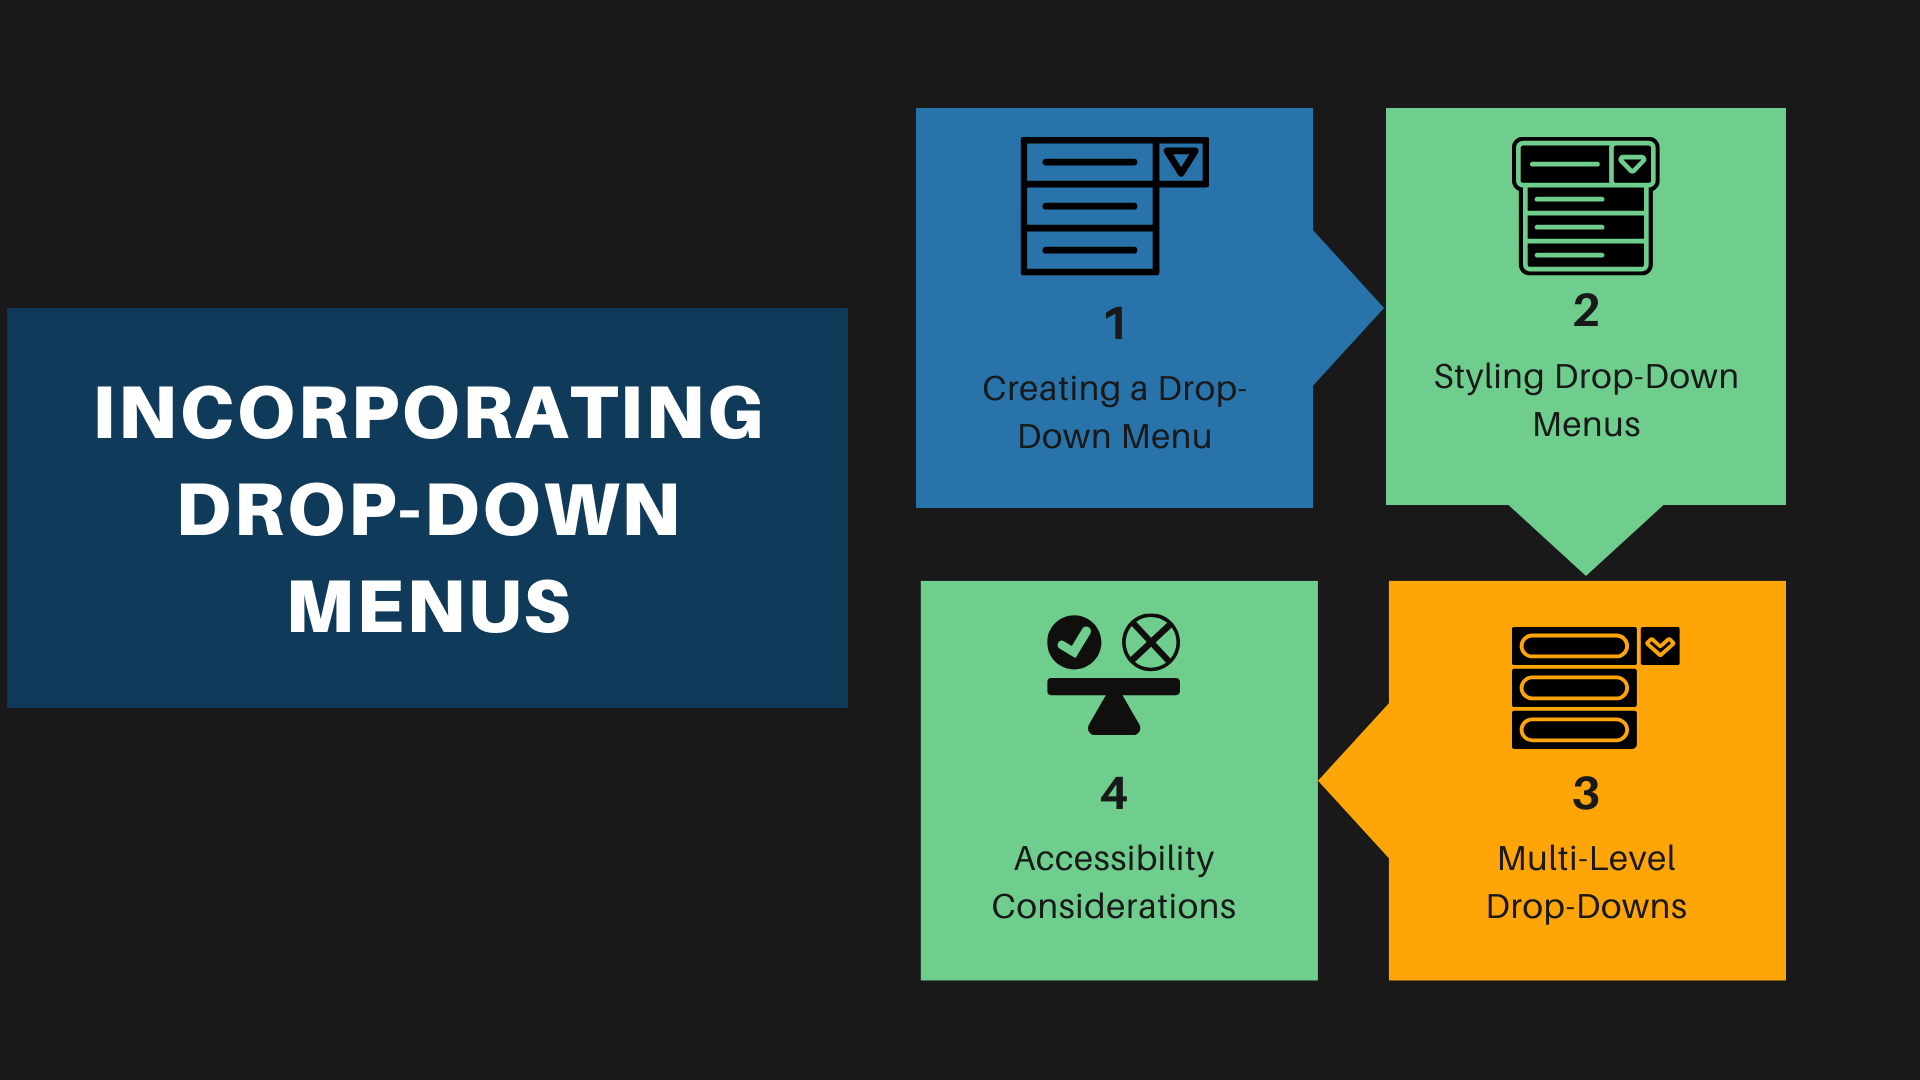
Drop-down menus are a fantastic way to organize your site’s navigation when you have multiple layers of content. They help keep your menu compact and your site uncluttered.
- Creating a Drop-Down Menu: In your WordPress menu structure, drag a menu item slightly to the right of the menu item above it to create a sub-item. This automatically turns it into a drop-down menu.
- Styling Drop-Down Menus: You can style your drop-down menus by going to the ‘Customize’ section under ‘Appearance.’ Here, you can adjust colors, fonts, and even animations for how the drop-down appears.
- Multi-Level Drop-Downs: For deeper navigation, you can create multi-level drop-down menus. However, it’s important to ensure that these are still easy to navigate and don’t overwhelm the user.
- Accessibility Considerations: Ensure that your drop-down menus are accessible, particularly for users navigating via keyboard or screen readers. This is not just good practice but also broadens your site’s audience.
Custom Links and Navigation Labels

Custom links and navigation labels in your WordPress menu offer a level of personalization and functionality that can significantly improve the user experience on your site.
- Adding Custom Links: You can direct your visitors to external sites or specific sections within your site by using custom links. This is particularly useful for linking to social media profiles or affiliate websites.
- Renaming Navigation Labels: While adding items to your menu, WordPress uses the title of the page or category by default. However, you can rename these to more user-friendly or concise terms to enhance clarity and navigation efficiency.
- Utilizing HTML in Labels: For a more creative touch, you can incorporate HTML elements like icons or different font styles within your navigation labels. This can help make your menu more visually appealing and intuitive.
- Link Target Options: When adding custom links, you can choose whether they open in the same window or a new tab. This can be crucial for keeping visitors on your site when linking to external resources.
Managing Your Menus
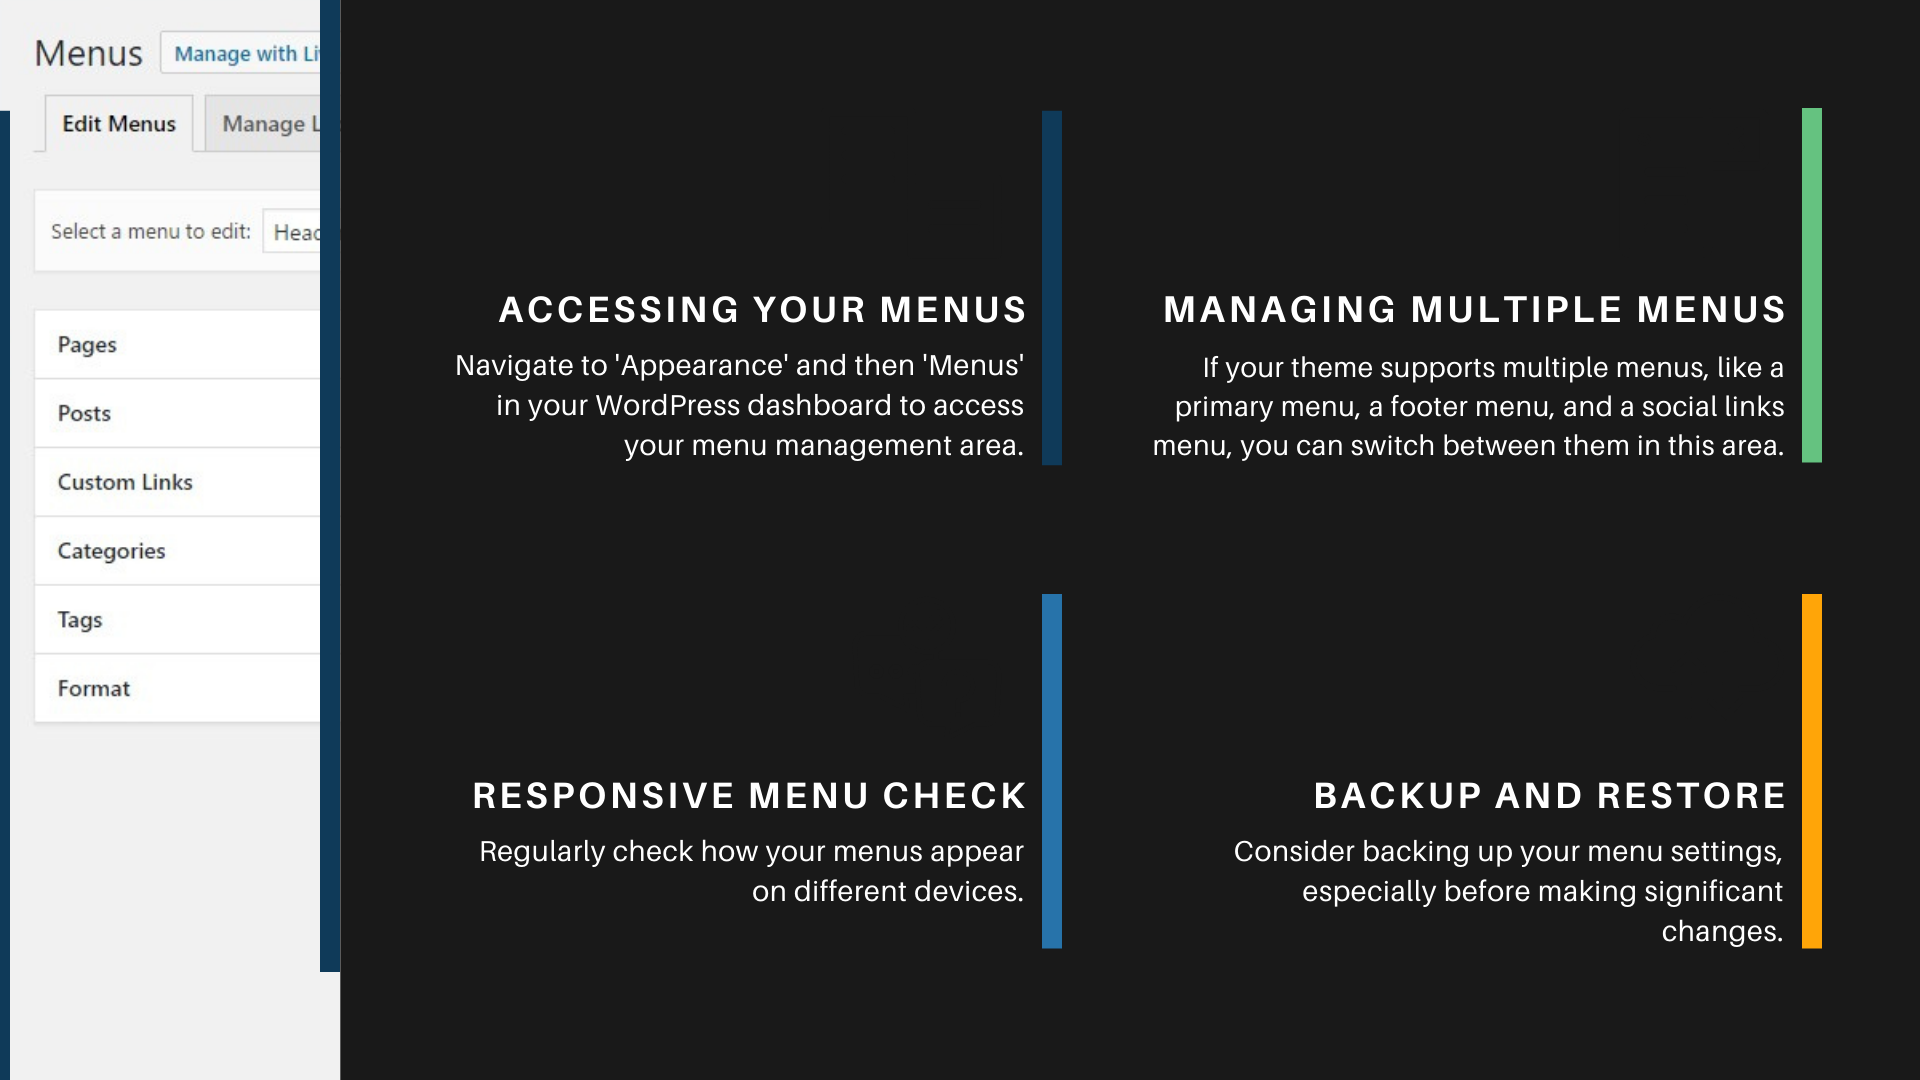
Efficiently managing your WordPress menus is key to maintaining an organized and user-friendly website. Regular management ensures that your navigation reflects the latest content and layout of your site.
- Accessing Your Menus: Navigate to ‘Appearance’ and then ‘Menus’ in your WordPress dashboard to access your menu management area. Here, you can select which menu you want to edit from a drop-down list of all your menus.
- Managing Multiple Menus: If your theme supports multiple menus, like a primary menu, a footer menu, and a social links menu, you can switch between them in this area. This allows you to tailor different parts of your site’s navigation.
- Responsive Menu Check: Regularly check how your menus appear on different devices. With the increasing use of mobile devices, ensuring that your menus are mobile-friendly is crucial.
- Backup and Restore: Consider backing up your menu settings, especially before making significant changes. This way, you can easily restore a previous version if needed.
Editing Existing Menus
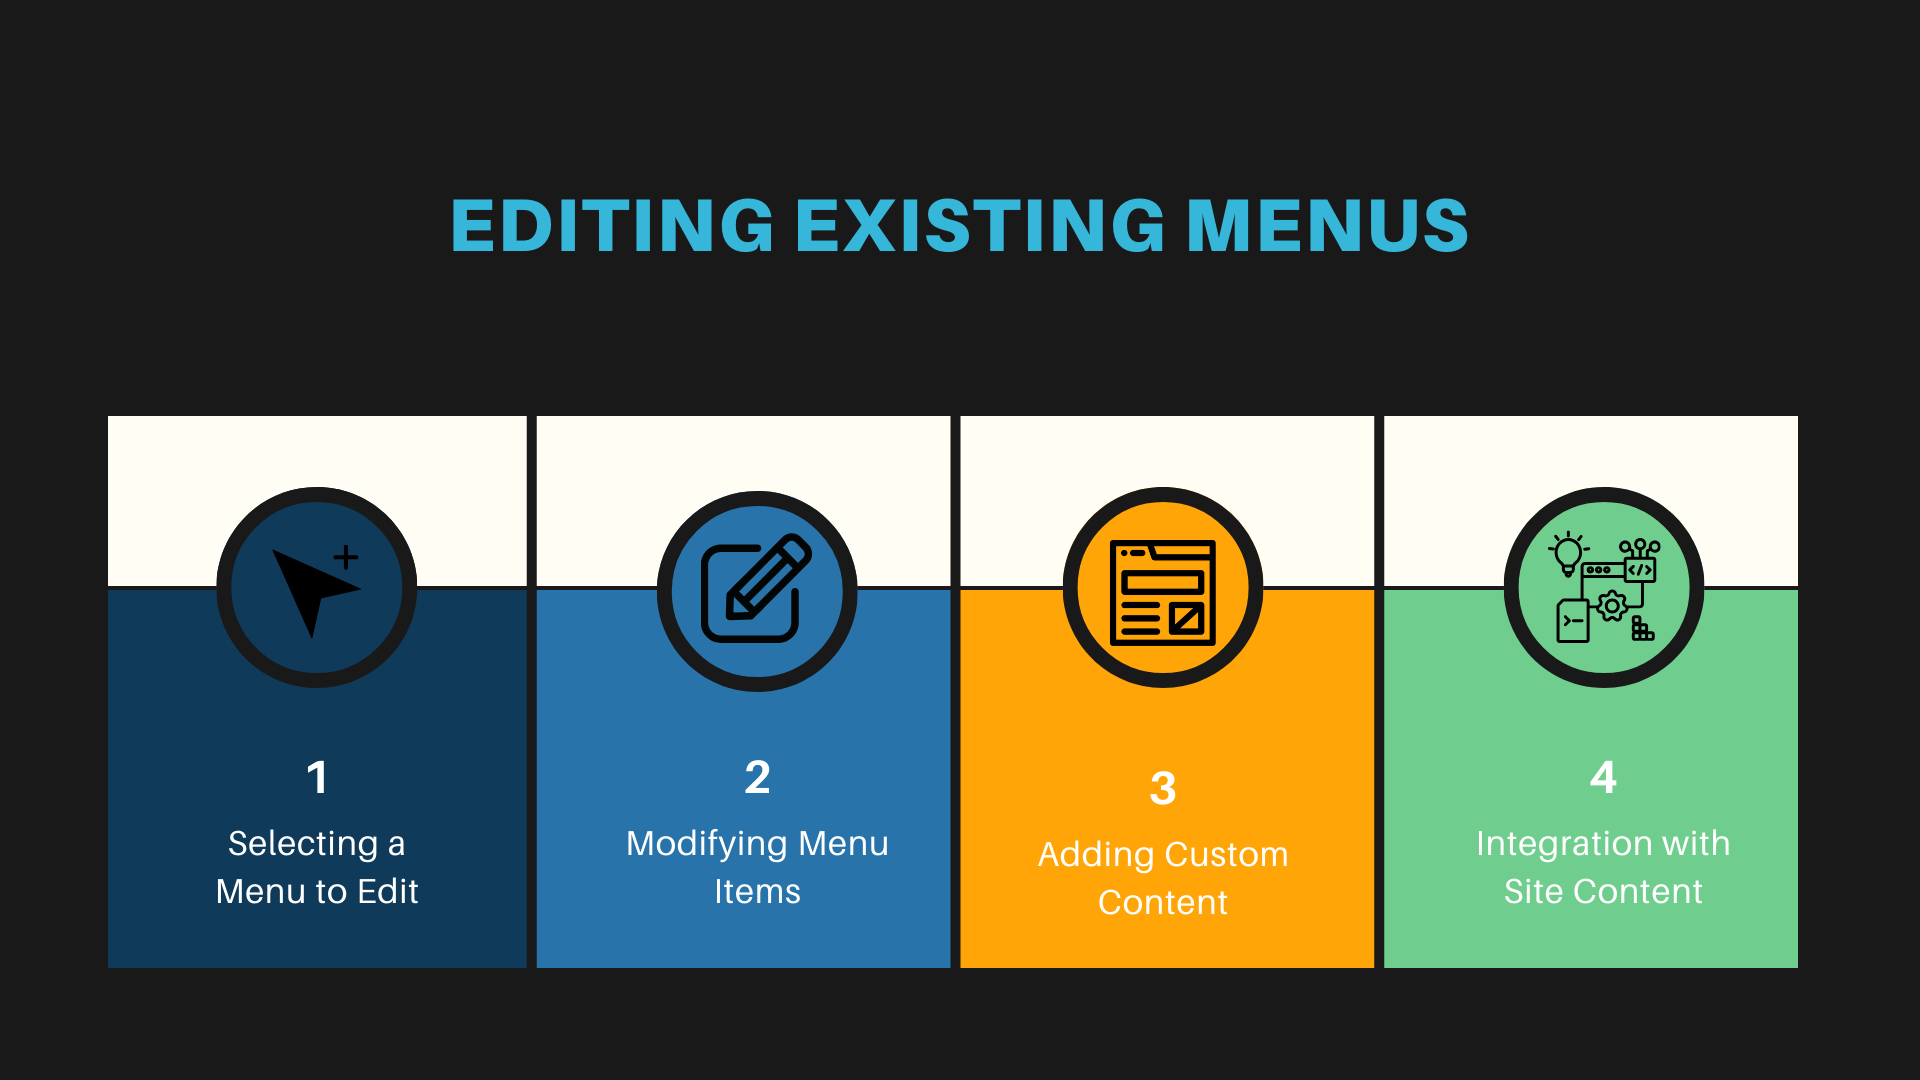
Editing existing menus in WordPress is a straightforward process that allows for continuous improvements and updates to your site’s navigation structure.
- Selecting a Menu to Edit: In the ‘Menus’ section of your WordPress dashboard, choose the menu you want to edit from the drop-down list.
- Modifying Menu Items: Click on any menu item to expand it. Here, you can change the navigation label, the title attribute, or the link target.
- Adding Custom Content: Besides pages and categories, consider adding custom post types or tags to your menu if your theme supports them.
- Integration with Site Content: Ensure your menu is aligned with the content of your site. As you add or remove pages or posts, update your menu to reflect these changes.
Removing and Reordering Menu Items
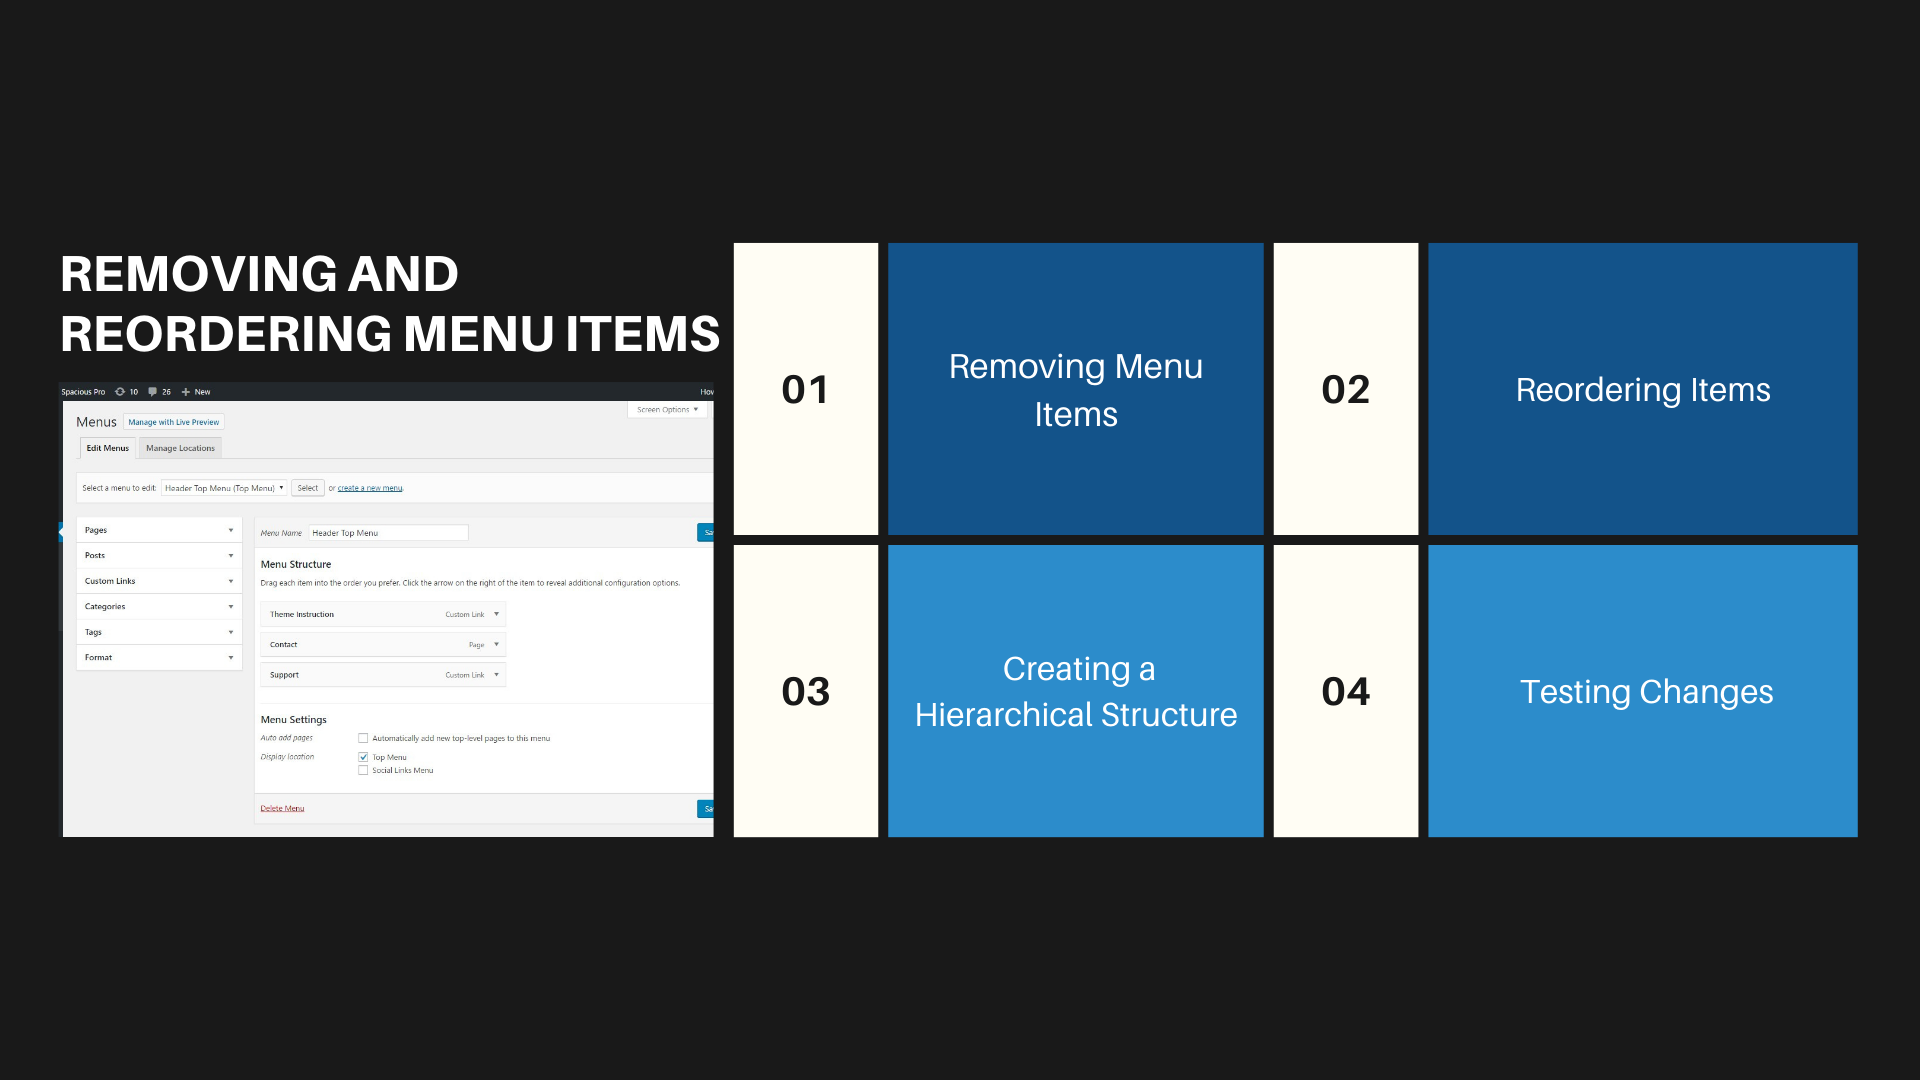
Regularly updating your menu involves not just adding new items but also removing and reordering existing ones. This keeps your navigation streamlined and relevant.
- Removing Menu Items: To remove an item, simply click on the arrow icon in the top right-hand corner of the menu item box to expand it, and then click ‘Remove.’ Remember, removing an item from the menu does not delete the page or category itself.
- Reordering Items: Click and drag menu items to reorder them. The order in your menu editor is how they will appear on your website. Consider the flow of your site and how users typically navigate content when deciding on order.
- Creating a Hierarchical Structure: Use drop-down menus to organize related items under broader categories. This not only cleans up your menu but also helps users navigate your site more intuitively.
- Testing Changes: After making changes, always preview your site to see how the menu functions. Pay special attention to the usability on different devices, especially mobile phones and tablets.
Expanding Menu Capabilities
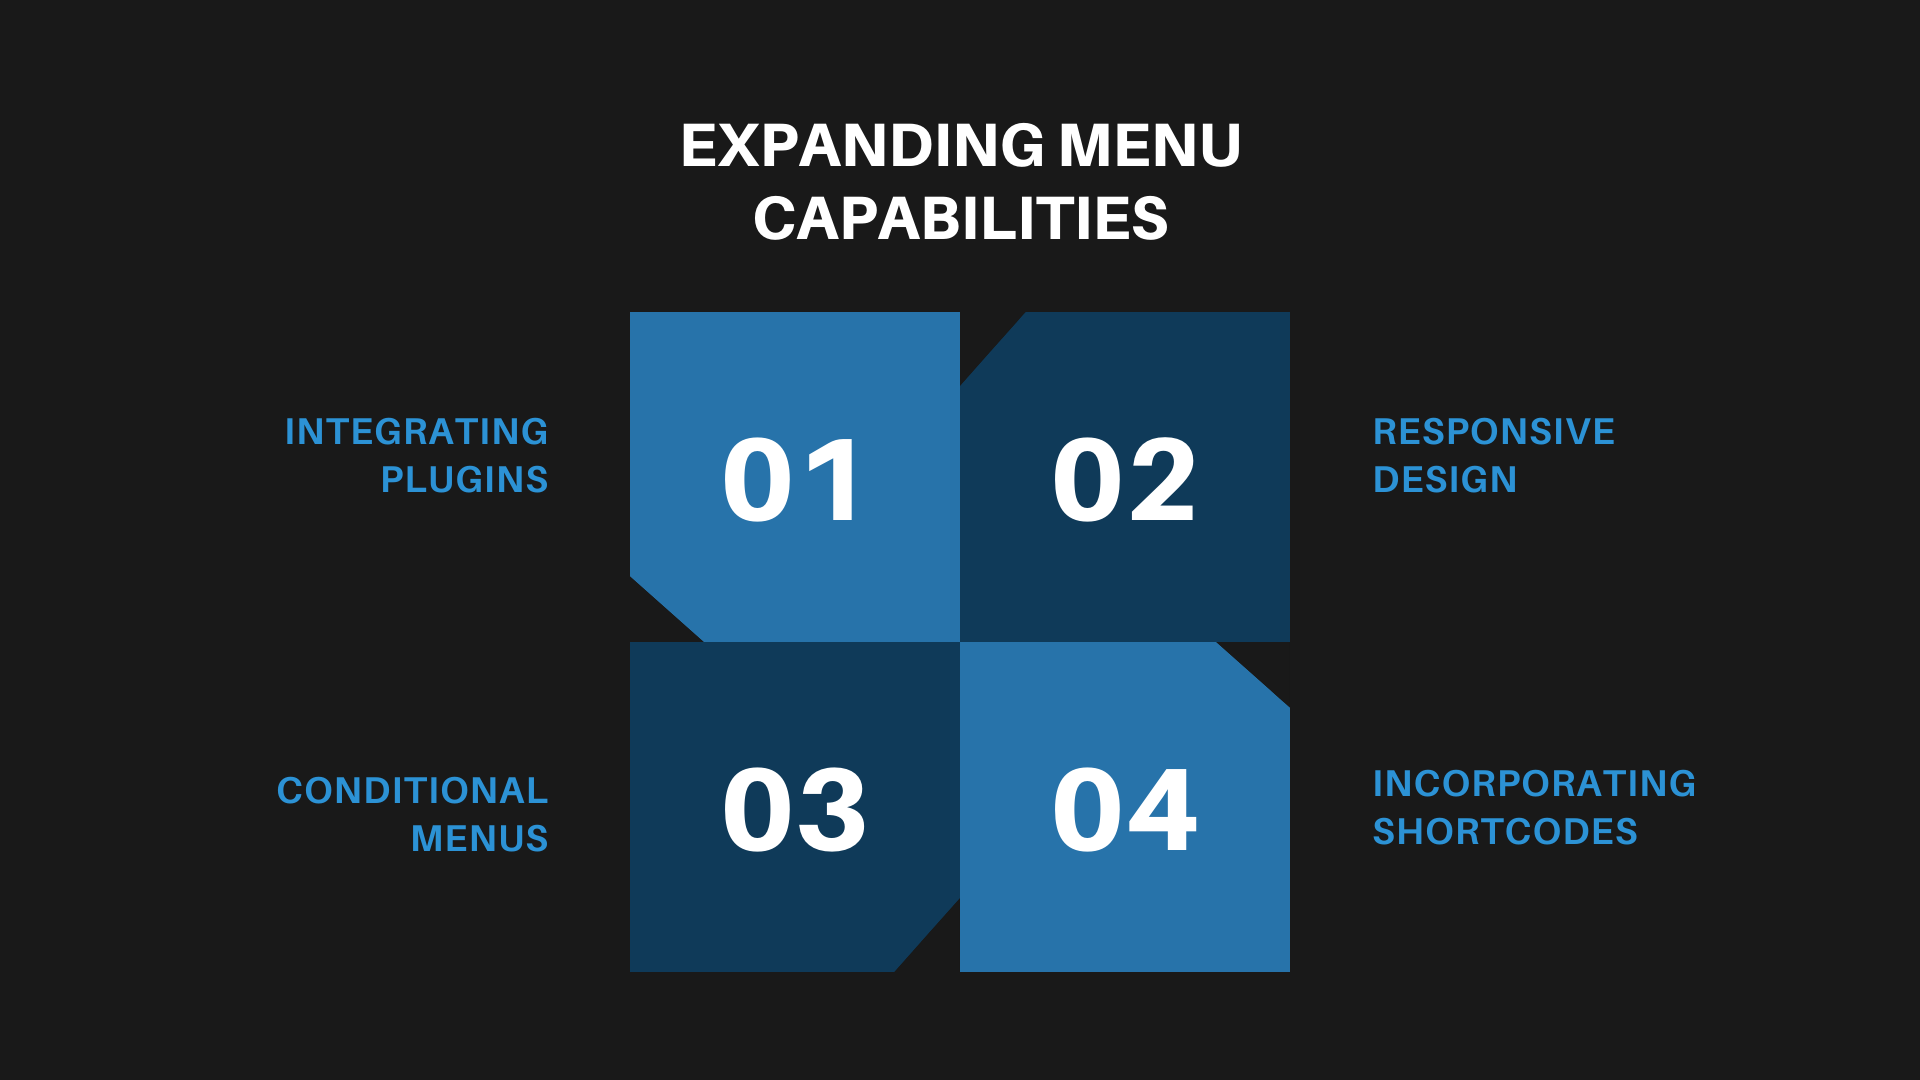
Expanding the capabilities of your WordPress menus can significantly enhance the functionality and aesthetic appeal of your website, offering a more engaging user experience.
- Integrating Plugins: Utilize plugins to add advanced features to your menus, like animations, mega menus, or even dynamic content based on user behavior or profiles.
- Responsive Design: Ensure your menus are responsive and mobile-friendly. This often requires different menu styles or structures on different devices.
- Conditional Menus: Explore the use of conditional menus that change based on specific criteria, such as user login status, time of day, or the page being viewed.
- Incorporating Shortcodes: Some themes and plugins allow the use of shortcodes in menus, enabling you to add unique elements like search bars, CTA buttons, or language switchers directly into your navigation.
Utilizing Full Site Editor for Menus
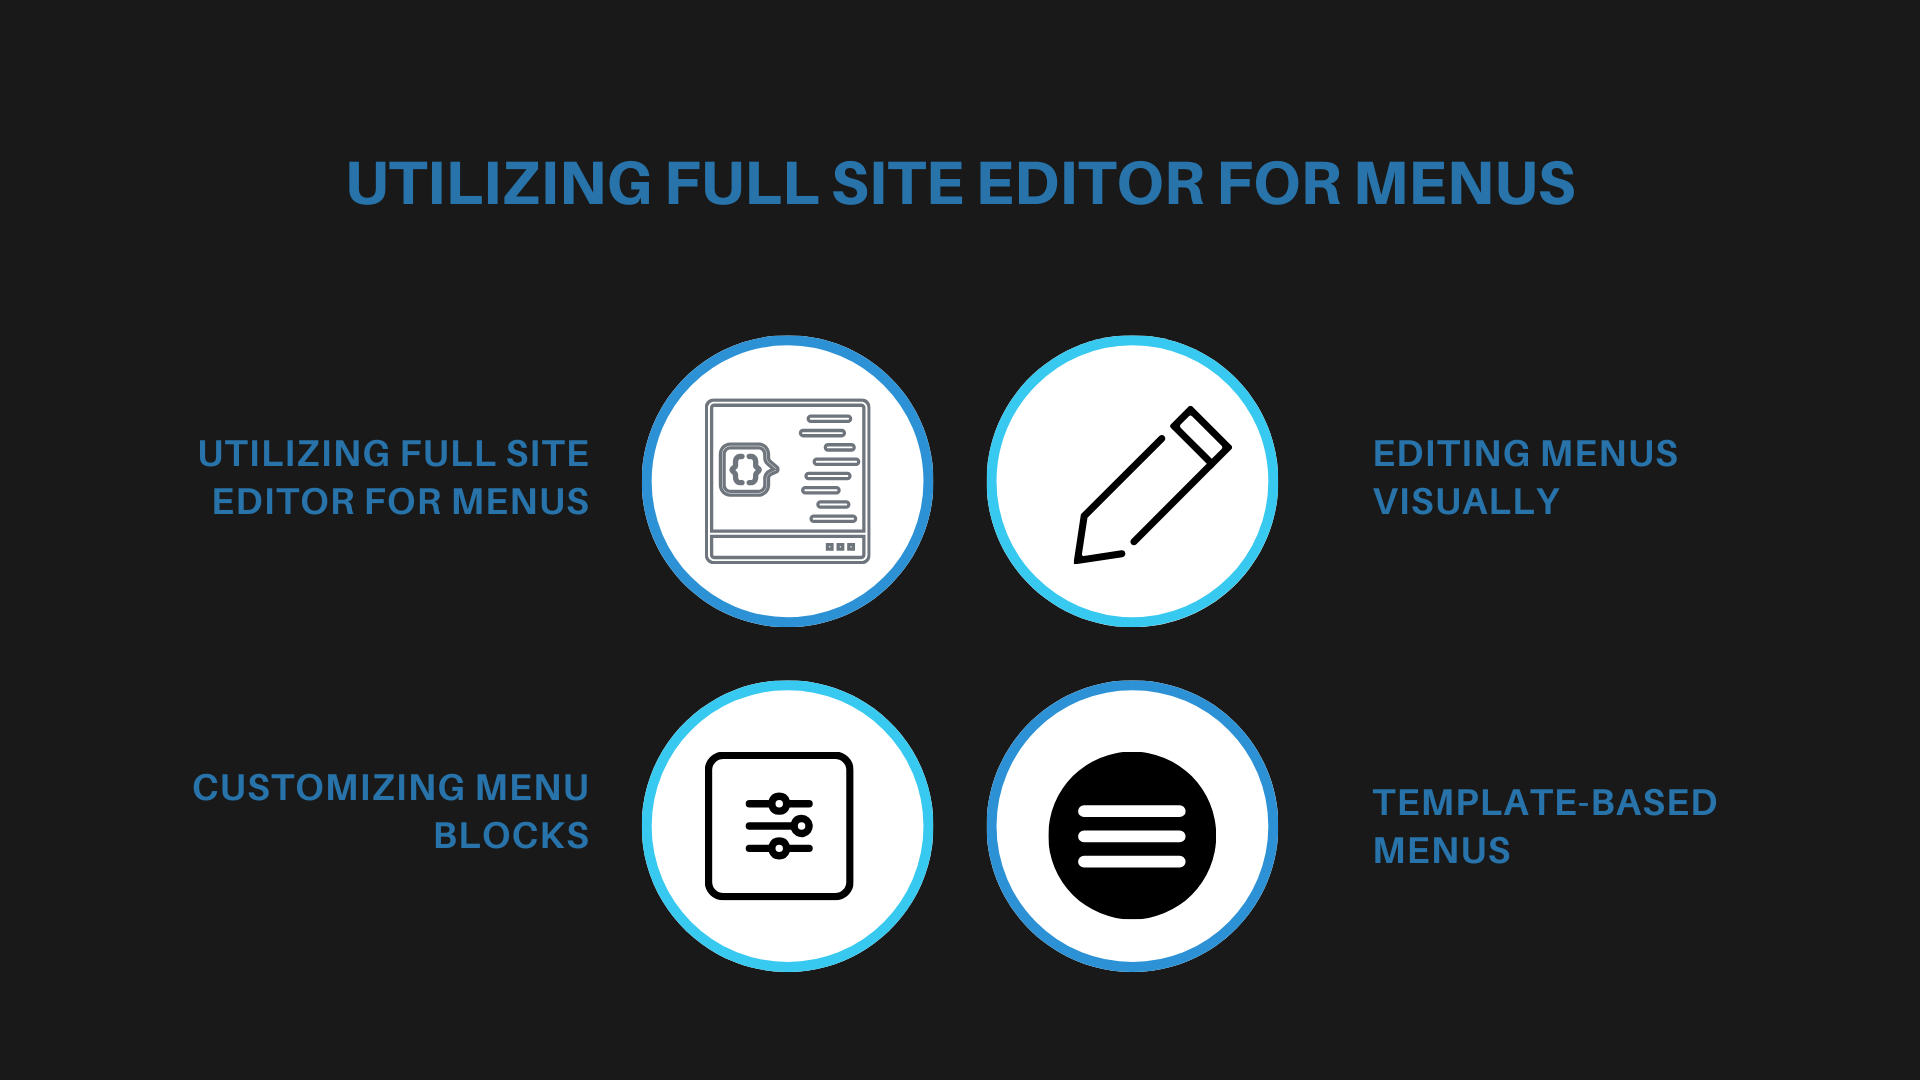
With the introduction of the Full Site Editor in WordPress, customizing menus has become more intuitive, offering a more visual approach to menu management.
- Accessing Full Site Editor: Navigate to ‘Appearance’ and select ‘Editor’ (provided you’re using a block-based theme) to access the Full Site Editor. Here, you can manage menus alongside other site elements.
- Editing Menus Visually: The Full Site Editor allows you to edit menus in a WYSIWYG (What You See Is What You Get) environment, making it easier to visualize changes in real time.
- Customizing Menu Blocks: Take advantage of the block-based approach to add, remove, or rearrange items with simple drag-and-drop actions. You can also customize individual menu items with additional styling options.
- Template-Based Menus: Experiment with different templates or template parts for menus, such as unique designs for headers or specific page layouts.
Menus in Sidebars and Footers
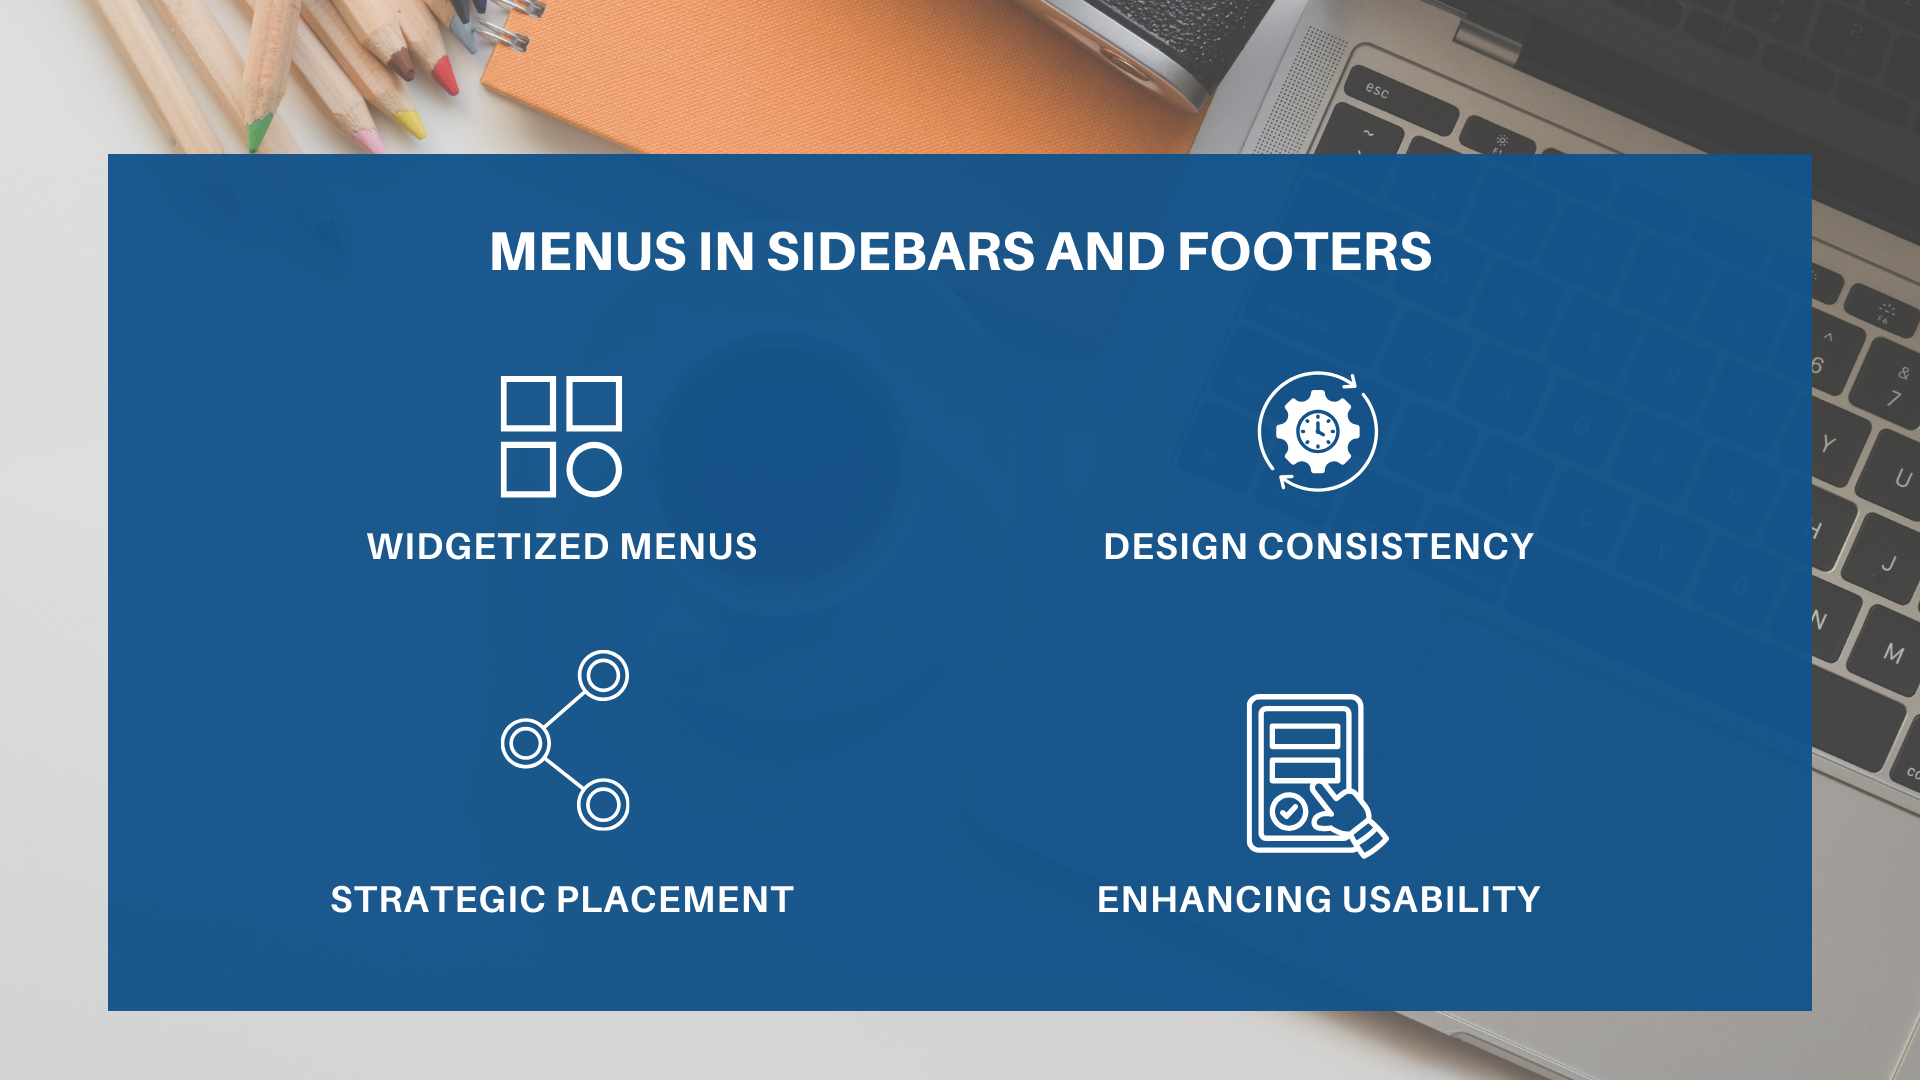
Incorporating menus into your website’s sidebars and footers can improve navigation and accessibility, making it easier for users to find important CTAs, links, and information.
- Widgetized Menus: Most WordPress themes support widgetized sidebars and footers. You can add a custom menu to these areas by using the ‘Navigation Menu’ widget.
- Design Consistency: Ensure that your sidebar and footer menus complement the overall design of your site. They should be visually distinct yet cohesive with your main navigation.
- Strategic Placement: Use sidebar and footer menus to offer links to secondary content, like privacy policies, contact information, or social media profiles. This helps declutter your main menu.
- Enhancing Usability: Consider adding a search bar or a list of popular posts to your sidebar for added functionality. In footers, sitemap-style menus can be very effective for comprehensive navigation.
Ready to Elevate Your Website?
At Hit Your Mark, we’re more than just a digital marketing agency. We’re your turnkey solution to online success.
Specializing in crafting polished, responsive websites, we bring your brand’s vision to life with a blend of creativity and cutting-edge technology.
But our expertise doesn’t stop there. Dive into our treasure trove of marketing insights on our blog, where we share the latest tips and strategies to keep you ahead of the curve.


Recent Comments